 Nail Art: Funky French Manicure!
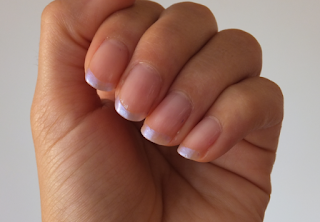
I'm a creative person and I'm always itching to draw and paint, so of course, this is no different for my nails (when I can be bothered to make an effort with them!)This design is a French manicure but instead of using the typical French white for the tips/free edges, I have used a subtle lilac with a lovely sheen.
The product is called 'Lunar Haze' from Boots - in the Natural Collection range. The iridescent shine is so lovely and it makes a subtle yet flattering finish when it's just used on the free edge of the nail.
Because the nail varnish is translucent you do need to follow the natural curve of the free edge as much as you can. This is so you don't have over-lapping lines where the nail varnish and the natural line marking the free edge meet.
 Detailed Nail Art: Making Transfers
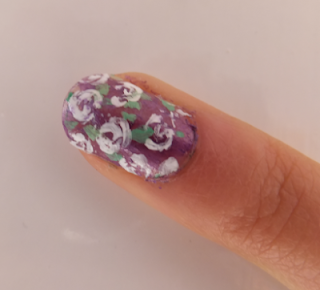
With details and patterns the thing that gets me in a flap most is having to paint with my left hand. I came up with the idea of transfers, and after looking online, I found that it is really easy to make your own nail art transfers!1. Paint a layer or two of top coat onto some cellophane or plastic sheeting
2. Paint nail art designs on top in acrylic paint (or nail varnish but not too thick)
3. Paint a layer of top coat over this
4. Wait for it to dry
5. With your nail or a cuticle stick, scrape the edge of the top coat upwards to get an 'edge' so you can peel the design right off. Be careful of peeling only some of the design off - make sure the edge bit you've peeled is in an even line and you're peeling the whole length of the top coat.


No comments:
Post a Comment
I welcome comments!